Translate

Showing posts with label foundation. Show all posts

Saturday, November 23, 2013

How To: Makeup for an Interview

Today's post is about proper makeup for a job interview. I had one today and I really liked how my look turned out so I thought I'd share! You definitely don't want too much, so to get my natural look keep on reading ---> 


1. First, use a primer to make sure your foundation lasts all day and doesn't get shiny. You don't want your interviewer to think you're dirty! I used Smashbox Photo Finish Blemish Control. Using your fingers, put this all over your face but be sure to focus on the middle of your face because that is where makeup tends to thin out during the day.

2. Apply a natural, matte foundation using a dense foundation brush. I used Makeup Forever's Mat Velvet (LOVE.) This stuff lasts a long time- takes about 5+ hours to get shiny on my face, which is really good! 

3. Set your foundation with a translucent (or natural color) powder. I used Laura Mercier's Translucent loose powder and it worked so well. Really great product, but a little on the pricey side.

4. Apply a light & pretty blush to give you a little flush. Take Benefit's Hervana to the apples of your cheeks, but don't use too much!

5. Before applying eyeshadow be sure to use a primer. Do not forget this or your eyeshadow will crease and it'll look like a mess! Urban Decay Primer Potions are the best. My eye makeup still looks perfect at the end of the day whenever I use this. 

6. To get the most natural eye look I used Urban Decay's Naked Basics palette. I put W.O.S. all over the lid, Naked 2 in the crease, a very small amount of Faint in the outer crease and Foxy with a bit of Venus as a brow highlight. 

7. Apply a thin line of eyeliner on your upper lash line and flick it out to get a slight wing. Don't go overboard on this step because you really don't want too much. I tried out Essence's Super Fine Eyeliner Pen because it's incredibly thin & I really liked it! And it's $2.99 from Ulta! 

8. Top it off with your favorite mascara! Today I used Bare Minerals Lash Domination, but I did not like it at all... Review coming soon. 

9. Finally, apply a little bit of lip product. I chose one of my favorite Baby Lips in Peach Kiss. Its really neutral with a slight bit of shimmer and shine. You could go for a light pink if you wanted something a little more fun. 

Voila! You'll be ready and feelin' beautiful for your interview! Go get em'!


Good luck!

--Ms. Makeup

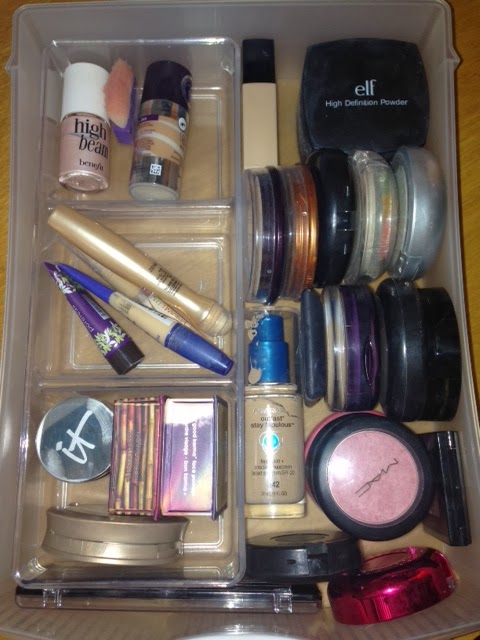
Pros of coming home from college- getting to sneak into your sisters room and try out all her makeup. All the products I used today are from her makeup collection, so thanks girl (hehe!)


Friday, October 25, 2013

How To: Store Makeup in College

This post goes out to any college girls who are having trouble with storage and organization for their makeup! I think I have a pretty good setup, so here is what I do!

This is an overall view of my little makeup station ---->
I bought the plastic drawers from Target for $27.97. They're called the Room Essentials Medium Counter Top Drawer in white. Very helpful for organization.


The brush holders came with the brushes I bought from Sigma. Some brushes are from the Mrs. Bunny Essential Kit from Sigma, some Sonia Kashuk and the other ones are just random.


I think I got the mirror from TJ Maxx. It's just a dual sided mirror with magnification on one side. Can be found at Target, Ulta, Bed Bath and Beyond, etc.


<---- Here's a closer look at the brushes I brought to school. I store my larger face brushes in one container and my eyeshadow brushes and smaller face brushes in the other container. ---->


Now into the drawers!


In the top drawer I store all my face products. I got the clear organization trays from target for around $5-6. I separate the sections by what I use the most, primers/concealers, and then 2 random products in the back. On the side I put all my foundations, face powders and blushes. 


In the second drawer I put eye stuff. Eyeshadows and primers in the compartments and all my mascaras and eyeliners on the side. Really no rhyme or reason to the mascaras and eyeliners, I just throw them in a pile. Also my eyelash curler from Sephora and some eyelashes and a sharpener!


In the third drawer I put lip products and my two Naked Palettes. These organizers are great for lipstick because they fit perfectly in the compartments. Then I have extra makeup remover pads from Almay and my new kit from benefit on top of the Naked Palettes plus some lip glosses.


I hope this was helpful for anyone looking for ideas on how effectively store your products in college! Help me by sharing this with any other makeup obsessed college girls!

-- Ms. Makeup

Wednesday, October 23, 2013

Review: It Cosmetics Bye Bye Redness

I recently saw a video on the It Bye Bye Redness Neutralizing Correcting Cream. It seemed pretty amazing so I had to try it. Now, for the size of this foundation (11 ml) this stuff is very expensive. I ordered it off of Ulta.com and it was $32... I would normally never pay that for something of that size but this foundation seemed too good to be true.

"Bye Bye Redness is a red neutralizing and correcting cream that completely cancels redness in your skin from view. Rich in Peptides, Hydrolyzed Collagen and Anti-Aging Technology, Bye Bye Redness camoflages redness and any red-tones skin discolorations from rosacea, broken capillaries, blemished skin, irritated skin, sun damage, scars, age spots, physician procedures and more."

That's a lot to claim! The first time I used this product it didn't react well with my skin. It looked good, but it made me really itchy, especially in the cracks of my nose, and I was extremely disappointed. I later discovered that this was because my skin was going through a weird phase and it was dry (normally very oily.) Once the dryness went away, I tried it again. ITS AMAZING. It doesn't feel like a foundation- it has a whipped consistency and has an airy feel on the face. And it covers everything! Not to the point where it looks unnatural, it just looks like you have perfect skin. As far as the redness in my skin, it does cover it completely. The best part for me is that it stayed matte all day. ALL DAY. I put a powder over it in the morning and when I got home at night, it looked basically the same. That has never happened for me. My skin is usually oily at least 2 hours after applying foundation. Not anymore! For application, I prefer to apply it with my fingers, just because I don't really like the look that brushes give (this stuff also blends right in.) I don't know how, but I feel like this product adjusts to your skin if it is on the fair side because there is no color option when purchasing. Lastly, for the price, yes it is more expensive, but you literally only need the smallest bit to cover your whole face because it blends out so well. If I haven't convinced you yet, then you just have to try it to believe it!

I had never heard of "IT Cosmetics" but now I have to try some more products!

What do you think of this correcting cream?

-- Ms. Makeup

Looks thick, but it's light
as air!
Amazing!